
OTM is an expert system that is simple to use.
NOTE: It’s always challenging to switch from a historically grown project management system to a new one. From our experience, people always miss the “old” procedures and workarounds they have internalized in the past.
Thus it’s very important to have an open mind for the “new thing”, understanding that the new environment is not evil, but more intuitive and time-saving than the old one.
We would like to share some tips and recommendations
for making the best of your start with OTM.
PREPARATION
STEP 1 – PROJECT MANAGER INTERFACE
STEP 2 – ADMINISTRATIVE BACK END
STEP 3 – RESOURCE REGISTRATION (OPTIONAL)
STARTING THE FIRST PROJECT
PREPARATION
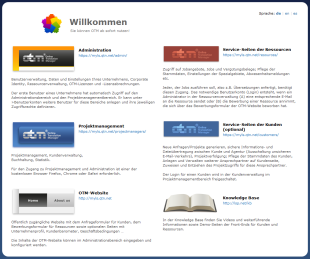 OTM start page
Use the OTM start page. You received the web link to your OTM start page in the mail accompanying the activation of your OTM license. Your personal start page offers direct navigation to the individual OTM web interfaces.
If you have lost or deleted the mail with the address of your OTM start page, notify us by e-mail at support@qtn.net and we'll gladly provide you with the link again.
Tip: Bookmark the OTM start page in your browser or on your desktop.
STEP 1 – PROJECT MANAGER INTERFACE
a) Video demonstration
Have a look at an OTM project in our training video. The example shows a project from the customer inquiry to the conclusion of the project.
Time required: 35 minutes
b) Training project
In the project manager interface, you'll see a button for requesting a simple training project. When you request a training project, LSP.net plays the role of a customer and as a resource if necessary.
Time required for the training project: approx. 1 hour
Please note: We do our best to respond quickly in the training projects. However, we ask that you be patient if if does take longer to respond, as time zone differences and other factors may cause some delays.
STEP 2 – ADMINISTRATIVE BACK END
You'll understand the functions of OTM most quickly if you have a look at the administration module (back end) of OTM and adapt the settings their with the information for your organization. In cases of uncertainty it's best to use the recommended settings.
We published a HD video on YouTube showing the administration part in detail.
Time required for Step 2: approx. 1-3 hours
Tip: Please read the brief remarks and explanations regarding the individual topics carefully.
STEP 3 – RESOURCE REGISTRATION (OPTIONAL)
If you intend to assign jobs to other language service providers (such as in-house staff, team members, freelancers or agencies), they must be in your OTM database.
To do this, please go to >Administration >Resource administration >Resources to enter the e-mail addresses of the resources you wish to invite. OTM automatically enables the service pages for the relevant resources an sends e-mail messages with the login data. The e-mail also includes a request for resources to log in to the OTM pages and enter any remaining data required there.
Your resources will be maintained in the OTM database according to the information provided and will be available for job offers.
You can see which resources have not yet completed their data under >Administration >Resourcen administration >Candidates. E-mail reminders to complete the data can be sent from this tab.
Time required: about 20 seconds per resource
Tips: The appearance of a resource's web service area can be seen here: https://demo.qtn.net/demopages/resources/index.html
The text for the e-mail reminders can be edited under
>Administration >Standard texts >E-mails.
STARTING THE FIRST PROJECT
Choose a simple customer request and use it to create a new project in OTM. First, log in to the OTM Project Manager
environment.
When you create a new project, the customer data from it are also added automatically to the OTM database and assigned to the project.
After entering the basic data, you can continue with the project, for example by creating and sending a quotation.
Time required to create a quotation: depending on the complexity of the request, usually about 10-20 minutes (this goes much faster with a little experience)
Tips: Encourage your customers to submit new requests using the quote request form which is on your OTM web pages or integrated in your web site. Provide your customers with an OTM customer portal site if needed. This costs nothing and provides your customers with the most options and convenience for their projects. An example of an OTM customer portal site is here: https://www.lsp.net/kb/otm-customer-portal-en.html
Your OTM web site can be configured under >Administration >Corporate Identity >OTM website (settings).
The text and layout for your OTM web site can be edited under >Administration >Standard texts >OTM website (texts).
Additional assistance for using OTM
 OTM provides online help on every page
- Context-relevant display of help text
OTM provides online help on every page
- Context-relevant display of help text- Support e-mail button
- Link to the knowledge base
OTM Guide 2014 PDF download (1.5 MB)
OTM knowledge base | FAQ | News | Blog | ^Top of this page^