Delivering a job in OTM
This workflow describes how translated files are uploaded to OTM and delivered to the customer. In this example, the customer has service pages activated from which the delivery can be downloaded. If service pages have not been activated, the notification mail sent will contain an HTTPS link to the delivery which will be valid for two weeks.
Go to the Job Files tab for file delivery
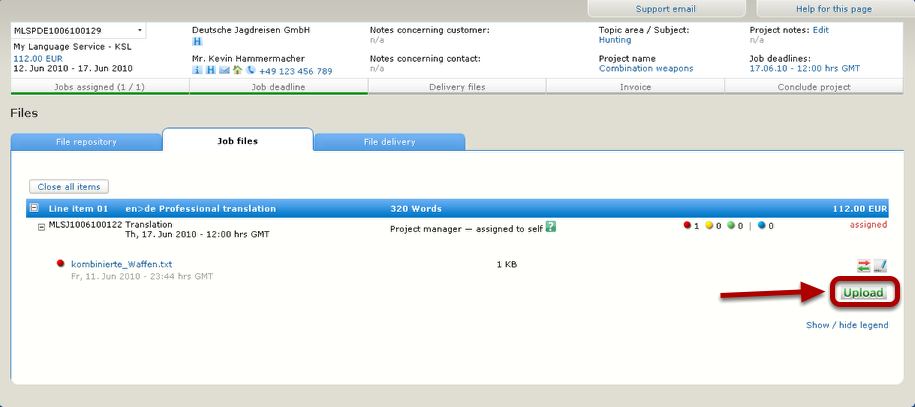
Click "delivery files" in the project progress bar under the project information summary at the top of the view to navigate to the Files view. Select the job files tab there. Click the Upload button to show the controls for uploading the finished translation.
Upload the translation
Use the Browse button to select the file to upload for the delivery. Multiple files should be packaged in a ZIP file or similar. Note the checkbox indicated by the red arrow. If this is marked, the delivery will be re-named automatically so that the file name is the same as the source file but with an extension added for the language pair (see the example in the next step). This is to help project managers avoid confusion with many files and many language pairs. However, if the wrong file is selected, this may not be immediately apparent, because the name will be changed! So be careful. If the checkbox is not marked, the original name of the uploaded file will be retained.
Reminder dialog
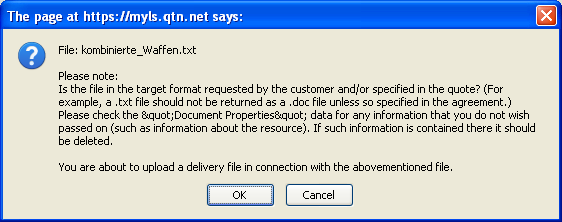
Before the file is uploaded, a reminder dialog is displayed asking you to check that the delivery does in fact correspond with the requirements.
Delivery file uploaded
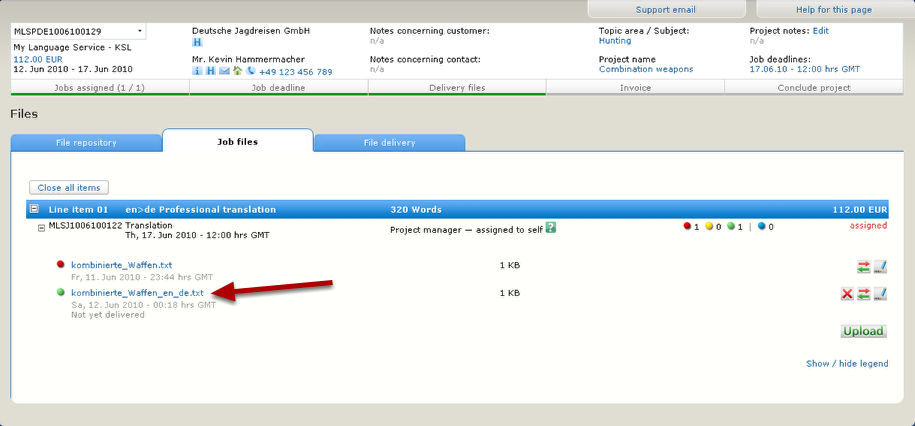
Note that the name of the delivered file was changed to that of the source file plus a suffix for the language pair. The time of the upload is indicated as well as the fact that the customer has not yet been notified.
Delivery notification mail
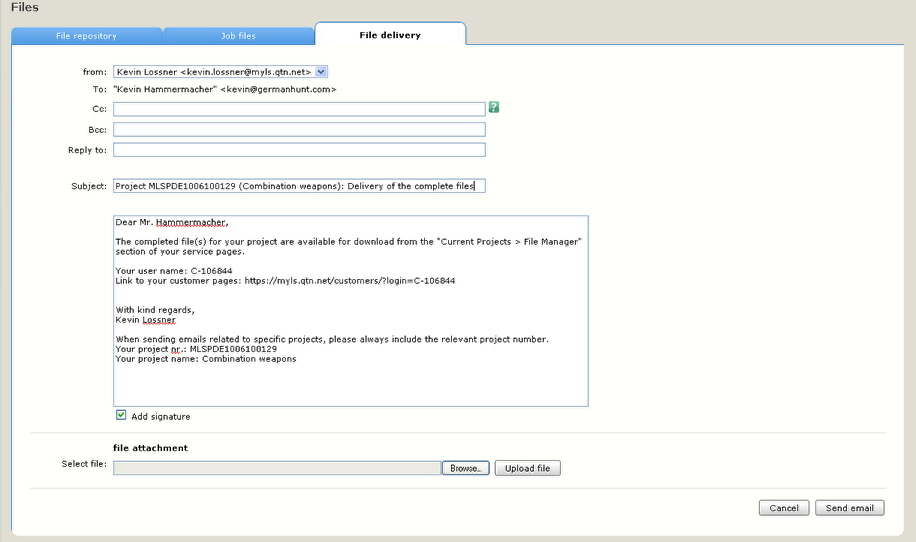
Selecting the file delivery tab in the Files view shows the e-mail message to notify the customer of the delivery. In this case the customer can download the file from his service pages. This letter can be customized. Click the Send E-mail button to deliver the notification.